Tag: Suspension

Nitron NTR1 suspension and new lower wishbones fitted.

Nitron NTR1 suspension and new lower wishbones fitted.

Car into Ratrace Motorsport to have the NITRON NTR1 suspension fitted and full geometry / flat flooring (117kg driver).

New lower wishbones fitted; due to bearing carriers being out of spec i.e. too loose after being powder coated.

42,317 miles. (Ratrace Motorsport) Invoice: 1678

IMG_0723IMG_2175IMG_7423IMG_0959

Nitron NTR1s ordered

Nitron NTR1s ordered

3 week lead time.

£1344 + P&P. (Ratrace Motorsport) Invoice: 1672 (order No: 1605)

CATERHAM WIDE TRACK DE-DION (POST`96) NTR R1 SUSPENSION KIT

The NTR R1 system offers unrivalled performance and value with a design that gives drivers a wide range of effective, easy to use damping control.

2-Way combined damping adjustment. Developed from our full race suspension and sharing many components with the R3 system, the R1 offers exceptional performance, reliability and value for both road and track use. Widely praised by drivers around the world and respected for out-performing considerably more expensive suspension kits.

R1 kits provides uncompromising quality, reliability and performance without the need for a remote canister. Fade-resistant and hand built with ultra-low friction components, the R1 shock is made to last on the road and track.

The high-grade materials protect against corrosion whilst reducing weight. Every R1 kit is custom built, sprung and fully serviceable. Titanium and hard-anodised parts are hand built to last not only season after season, but also the harshest of winters.

Car collected from Ratrace.

Right, collected the care from Rob at Ratrace and I am very pleased with the standard of his work, knowledge of all thing mechanical and specifically 7.  His approach is just really good in my opinion, wanting to get things right but not reinvent the wheel unnecessarily.  I will definitely be going back to him.

Upon collection Rob, adjusted the throttle pedal for me to be able to heel and toe on down changes and then set the rear anti-roll bar drop links with me sat in the car.

The car starts and idles very nicely.  In fact, the engine is now so smooth.  To start from cold it requires a little throttle until the engine starts to warm, at which point it is rock steady.

The fitment of correct track road ends has made a noticeable difference to the steering.  It was good before but now is sublime, reacting to the slightest touch with a new found lightness and feel.

The engine needs to be mapped and Rob has strongly recommended travelling to Emerald http://www.emeraldm3d.com/rolling-road in deepest, darkest Norfolk, to get this work done.  I just need to remind them that the air horn length (throttle trumpets) has been set at 90mm and may need a little adjustment.  I also want to a sensible rev limit set as my K Series has a standard bottom end and the Caterham Super Sport rev limit (7600 rpm) is generally viewed as too high for sustained use, without a forged bottom end.  To that end, I have been advised by both Dave Andrews t/a DVA Engines and Rob at Ratrace Motorsport that anywhere between 7,000 to 7,200 rpm should be fine; and will take Emerald’s advice on the day.

I also need new lower (front) wishbones fitted and new suspension all round.  I think that is likely to be a set of the excellent Nitron NTR1’s.  Typically Caterham are out of stock of right hand lower wishbones, with an expected delivery date of 9th February.  Rob has a set on back order for me.

Watch this space for updates!

Meteor Motorsport suspension options

Right spoke to Simon Rogers at Meteor Motorsport this morning, to discuss my options. Prior to doing so I read his excellent buyers guide which I attach below in italics.

With my budget I am realistically looking at Nitron NTR1’s with the Suplex springs or possibly Eibach or Quantum Zero One’s, again with Suplex springs or Eibach but with the Digressive shim pack for the front shock absorbers.

Both currently have a lead time of aboyt 5 weeks.

Will wait for Rob to come back to be and then have  a conversation with my lovely and very understanding wife.  Simon Rogers very helpfully reminded me that this is a safety issue… no sure that will wash!

“I will try to answer and highlight the more general information which can be applied to your car before making recommendations at the end. You may find me rambling a little and referring to specific cars half way through.

As I hope you are aware I sell a range of brands of dampers. I also sell a range of specifications – non adjustable all the way to 4 way adjustable.

In order to justify to the manufacturers and customers why I recommend one product in a price range and specification over another I have set out all similar products to make the same margin in actual £ not percentage.

So on a 1 way set of Nitron’s I make the same margin as a 1 way set of Quantum and so on through the various specifications. I hope this justifies our independence and impartial advice.

Here we go then – fixed rate, 1 way, 2 way,3 way or more:?

Justifying a set of the 4 way Ohlins TX40 or 3 way Penske for road use will be difficult, however if you want the best specification at a very reasonable cost and you really want the ultimate adjustment, quality of product and brand then they are worth every penny. Indeed I have sold a number of sets to road going owners who wanted just that ultimate performance. You will never ever need another set of dampers! In many respects I think you possibly feel the better quality of a damper on the road than you do on a track

where surfaces are far smoother and consistent. On track the clock and your confidence will always feel that performance gain. Fixed Rate Dampers

As it says really these are suspension dampers which have no adjustment for the valving of the damper. They do have ride height adjustment but nothing else. For this specification we only offer the Quantum Zero. It is available in regular linear piston and valve configuration, digressive/linear piston formats. Our specification will make sure the suspension will be set up exactly for your needs not to hard and certainly a great improvement on standard dampers. (For digressive valving and pistons please see the information below).

The Quantum Zero is fully upgradeable to either one or two way in the future if required as it would be to add digressive pistons at a later date.

Quantum Zero £1091.08 incl springs + vat
1 Way Adjustment – One adjuster that alters both Compression and Rebound settings

In the one way range we have AVO Twin Tube aluminum dampers (not gas pressurised) Nitron Street Series, Quantum One.Zero, Nitron NTR1, Nitron NTR1 Pro 46mm and Penske 7500. The most cost effective of the 1 way damper is the
Nitron Street Series @ £699.00 (Only available for certain car specifications).

AVO £684.20 + vat
Nitron NTR1 @ £1299.00 + vat
Nitron NTR1 @ £1587..50 + vat
QRS One.Zero @ £1399.00 + vat
Penske 7500 1 Way @ £1980.00+ vat (or £2320.00 + vat with clicker)

Nitron offer two great value, well specified products within this range, both recognizable by the smart hard anodised grey exterior coating. The Street Series may well be the damper for you if you are looking to upgrade your regular road use damper to something for more focused and spirited driving. These offer a wide range of adjustability, albeit having factory specified valving, which is the same both front and rear. Spring rates are also factory specified and are biased slightly towards retaining a reasonable degree of compliance on the road. The Street Series has at least 35 clicks of adjustment.

The NTR1 is probably the more familiar of the Nitron 1 way dampers which you will see on many Caterham’s. This is altogether a more focused product that benefits from being ‘made to order’ so allows input from Meteor to ensure our massive experience with Caterham suspension is fully utilised. The NTR1 has 24 clicks of adjustment.

The Nitron NTR1 Pro 46mm until recently has not been something I would have recommended for use with a lightweight car. It has not been able to flow enough oil at low speed damper movement (giving to firm a ride). Now though following work with our Autograss customers I am able to use a high flow 46mm piston in the build specification. This now means that the 46mm Pro damper performs exactly as required. With the benefits arising from greater oil capacity and strength it’s a great damper that should be considered.

The QRS is entirely manufactured and assembled in the UK save for perhaps the O rings or seals used. The quality of engineering design and indeed finish is second to none. Hard anodized just like the Nitron and available in an all black finish if required for a small additional cost.

The One.Zero has 27 “clicks” of adjustment. Very progressive and you really do feel the “clicks”. The Quantum has finer adjustment but the Nitron can be adjusted over a wider range.

Both manufacturers recommend bi annual service intervals. The main differentiator between the two dampers is the upgrade path and options. The most significant difference is the availability of the Digressive piston with Quantum. I think this makes a significant difference particularly to front end “turn in” and positive feedback through the wheel. Additionally the Quantum can be built into a 2 way damper with very little work perhaps at the time of service.

The Penske is as you would expect a fantastic product but I feel the Nitron and Quantum offer better value at there respective prices. If you want the ultimate performance it remains an valuable option.

I would have no difficulty recommending any of the above – it is dependent on the options and upgrades you may wish to make in the future.

2 Way Adjustment

We have 4 options here but only from 3 manufacturers .
QRS Two.Zero @ £2097.00 + vat
Penske 7500 @ £2337.60 + vat (sweep adjuster) and @ £2677.60 + vat. (clicker knob adjuster). Penske 8300 @ £3744.00 + vat – remote reservoir and upgradeable to 3 way 8700 specification.

Ohlins 2 way with remote reservoir @ £3390.00 + vat
Ohlins ILX 2 Way – no reservoir required @ £4010.00 + vat (Fantastic dampers with great performance and packaging. Very easily tuned or modified to adjust in more “ways”).

The Penske 8300, Ohlins and Quantum all have digressive piston options. We have just taken delivery of the first Nitron Digressive pistons for us to develop. These will be available later in the year. Penske and Ohlins included in cost and Quantum @ £250/set. I think the Quantum offers the better value for money at this level but you need to offset this with Penske and Ohlins reputation, performance and brand. The Penske 8300 however is a fantastic spec and damper now with the possibility to upgrade to 3 way. This would be my choice if funds were available. I must emphasize that the Quantum has nothing to worry about here either coming from F1 History. I guess I am saying its personal choice.

3 & 4 Way Adjustment

At this level we have the Nitron NTR3, Ohlins ILX, TTX40 and Penske. I have owned and used the Nitron NTR3 Pro for a competitive season and they were faultless. We now have new high flow pistons and valving available making this a great step into a multi way damper. Although a significant price differential my current damper of choice is the Penske 8700. There currently is a significant difference in the way the dampers perform and the way the car responds. If you are choosing a multi way damper it is likely you require the fine adjustment and performance of the Penske. It comes with a Digressive/Linear piston and is infinitely adjustable. Simply superb. I use this myself as it offers huge performance for a very very attractive cost. We have also just received the specifications for Ohlins ILX and TTX40. The ILX are an all in one damper with no remote canister and are of a very high specification. The TTX40 is a damper of a through rod design and just like the ILX have no external reservoir and are easy to install. These dampers require no remote canister and are available in 2, 3 and 4 way adjustment. The like for like cost is shown below. I would certainly recommend them if you have the budget. I have tested them on our dyno and the results and range of adjustment are at another level again. This is though reflected in the cost!

Nitron NTR 3 – £2712.50 + vat Nitron NTR 3 Pro – £3062.50.00 + vat

Penske 8700 – 3 Way – £4904.00 + vat Ohlins ILX – 3 Way – £5190.00 + vat

Springs

All of the above dampers (except the Street Series) can be supplied with linear springs or with our own twin spring progressive set up. The benefits of the progressive set up make for a far less harsh ride. I particularly like them on the rear of a 7. Do not underestimate the significant benefit that the new dampers and valving will bring to ride quality but the twin spring is a fantastic extra.

Pistons and Digressive Valving

Now just to confuse or add to the decision making process further I have developed with Quantum a valving and set up with what we call a “Digressive” piston. This affects the shape of the damper force curve/plot. It brings a further enhancement to ride and performance. Unfortunately as always there is a cost implication as the machining process for the digressive piston has to be completed on 2 different machines and has to be handled by a “man” a number of times. The linear piston is one machine – one time handling.

The digressive set up is available as an additional cost for both 1 way and 2 way QRS dampers @ £260.00 + vat For reference the 8300 and 8700 Penske’s comes with a digressive piston as standard.

General Information

Lets look at the standard dampers.

Bilstein. I have tested many and most of the various M1/M0 types etc (there are far more than the 2 specs). They perform well – the curve/plot is good except it’s all a little soft IMHO. Digressive in shape = good but just under damped. Works well on a road car with less power and momentum. Spring rates OK – front could be stiffened a little – rear is progressive and good.

My testing of these has found that although they seem not to fail to often they do not match each other very accurately. Indeed after testing one batch of 9 front dampers the range across all was in excess of 60% of the adjustment in a Quantum. Additionally it was the newest set that were the furthest apart. – hardest and softest. This not a criticism – they are simply different spec dampers intended for different work.

Any of the new dampers will make an improvement to ride and control, precision etc. So long as we get the spring rates correct they will not be harsh either.

So what to do? Well I do not yet know your budget. I will therefore make some assumptions.

You would like to see a good step up in performance – you probably drive it faster than when you first had the car so it’s not so much as the car falling away as you improving and feeling more comfortable. It’s a very very fast and stable car so you need to ensure it has the poise to make use of its power.

Option 1 – Ultimate spec.
Penske 8700 Series – 3 way adjustable – £4904.00+vat or Ohlins ILX 3 way – £5190.00+vat Nitron NTR3 Pro – £3062.50.00 + vat

Option 2 – High Spec/Performance 2 way

Penske 8300 £3744.00 + vat or
QRS 2 Way – Digressive piston £2357.00 + vat Ohlins ILX 2 way – £4010.00 + vat

Option 3 – 1 way adjustable

Difficult Choice – its up to you and your future plans. Nitron NTR1 – Linear £1299.00 + vat
QRS – 1 Way – Digressive/Linear Piston £1659.00 + vat

There are so many options without a budget it is difficult for me to make a selection. Let me have some figures and I will guide you more accurately.

The only thing I would add in the first instance is that I do offer a stiffer set up for the track guys – that’s the whole idea of speaking to me rather than a manufacturer who knows the dampers but not the car.

Lead Times

The approximate lead time for the manufacturers is stated below. Nitron 3 Weeks
Penske 3 Weeks
Ohlins 10 – 12 Weeks

Quantum 5 Weeks”

Houston we have a problem… well sort of

Rob from (the excellent) RatRace Motorsport phoned last night with an update.

The throttle bodies are fitted and that project is complete (just requires setting up on a rolling road, which will be down to me – when it is a little warmer!).

However, having stripped the rear suspension down to fit the new De Dion tube and then set the car up, he identifed that the car required new springs all round (something to do with being the old style progressive springs… I think), and that one of the adjustable spring platforms had seized (at the front I think he said).  In his experience it is apparently very dificult to free a seized platform without damaging the unit.  Closer examination had also identified damage to at least one of the rear shock absorber units. He notes that they had been hand painted; womtehing I was aware of when Seven and Classics overhauled the suspenion last summer (2017).

His ris o fthe opinion that the current suspension is original and is at the end of its servicebale life and recommends that it should be replaced.

Original Bilstein suspension are currently very expension through Caterham cars and therefore this makes upgrading the suspension to something like one of the Nitron or Quantum range, a sensible proposition.

He is going to make some enquiries and get back to me.

I mentioned Simon at Meteor Motosport and that I was aware that he offers Caterham specific valving for the Nitron NTR1 and Quantum Zero One ranges.  I think Rob was going to speak with Simon.  I may do so myself as having read Simon’s excellent buyers guide he likes to tailor spring rates etc to the specific car and how it will be used / power level / weight of the driver etc etc.

Watch this space…..

As an aside, what concerns me about this, is that my car has only ever been trusted to marque specialists with strong reputations for knowing 7’s inside and out and also excellence.  What is now apparent, is that they all without exceptions have missed things or in the case of the suspension damaged it and either not noticed or not flagged it up to me. This isn’t about proportioning blame or naming and shaming but is has been a salient lesson to me and I am pleased that I appear to have found someone who is really very good.

Update from Rob at Ratrace Motorsport

Phonecall from Rob to update me about the car, viz.

  1.  All four (4) CR500’s worn out and o/s/r has a nail present.  I was aware they would need changing.  Confirmed that Rob can change tyres and agreed I would order a set Avon ZZS to be delivered to him.
  2. The De Dion tube is original and is one of the thin wall models which should have been recalled by Caterham.  This is a safety issue and should be replaced.  Agreed.
  3. Rear springs are very compressed at the current ride height and a new perch is required.  Agreed.  
  4. Braced engine mount is very worn and should be replaced. Agreed.
  5. Rear anto roll bar is set up incorrectly and as a result when the car rolls the anit roll bar will try to make contact with the body.  This shoould be rebuilt correctly. Agreed.
  6. Mini track rod ends have been fitted which (a) will make the steerting unecessarily heavy and are very difficult to adjust.  These could be changed.  Agreed that they should be changed.

As a result of pts 4,5&6 car will need to be flat floored and geo checked. Will be flat floored for a 115 kg driver and 4.5 imp. gallons (20.5 litres) of fuel

I am very impressed with Rob’s diligence, SWMBO is less so!

Excellent article on suspension setup by Simon HOADE (Niknak Motorsport)

Excellent article on suspension setup by Simon HOADE (Niknak Motorsport)

My setup…

First off I have to stress that I’m not even close to being an expert with this stuff, and I completely acknowledge that what is working for me quite likely won’t work for a lot of other people. However, if anybody else can benefit even a tiny bit from this then that’s a good thing. Maybe it will work for you, maybe some bits will, maybe it won’t fit your driving style. Either way – here it is, all of the detail for my car and its setup right now.

Core components

Year 2002 imperial chassis with widetrack and K Series (140-145hp estimated), 6 speed box, 3.92 ZF LSD
Powerflex polyurethane bushes everywhere
Nitron dampers by Meteor Motorsport, re-valved early 2016, with Eibach springs

Setup

Weight (without driver): 520kg with approx. 20 litres of fuel, two thirds of a tank
Total weight: 580kg (yes I need to eat more pies)

Corner weights are set to equal diagonals which I prefer over equal fronts.

Front left: 128kg
Front right: 136kg
Rear left: 154kg
Rear right: 162kg

Ride heights (probably not a lot of value since I’m not sure where they’re measured from)

Front left: 118mm
Front right: 118mm
Rear left: 134mm
Rear right: 132mm

Average rake: 15mm

Geometry

Caster: 7.2-7.4 (full forward on wishbones)
Front camber: -2.7 (I might increase this for track – one turn of the ball joint should be worth approx. 0.3 degrees)
Rear camber: -1.4
Front toe: 2mm in each side (this is for road only, I change to 2-3mm toe-out for track)
Rear toe: 2mm in each side

All of the above was with virtually new Avon ZZR tyres (185/55/13 front, 215/55/13 rear) set to 17.5psi

Tyre pressures: 20psi starting/cold pressure (all round)

Front roll bar: blue (9/16″)
Rear roll bar: +2 (0 being disconnected, 4 being stiffest)

Radius arms set to lower position

Front springs: 225lb/in
Rear springs: 150lb/in (plus 4lb/in helper springs)
Front dampers: -8 from full hard
Rear dampers: -6 from full hard

That’s about it. I have various other things on the car like the 22% rack and big brakes front and rear. Lowered floor and Tillett seat, aero screen, half-doors, tonneau cover – many of those things contribute to how the car behaves. Since the setup was done I’m running a little more pressure in the tyres which will have potentially increased the ride height a tiny bit, and as the fuel burns off the rake does increase by 2-3mm towards the very end of the tank, so it really starts to feel quite lively by that point – but that’s what I like. It works for me and I’m extremely happy with the car at the moment.

Please take with a pinch of salt of course – use what you like, ignore what you don’t like, suggest improvements if you can. It’s one big learning experience

Suspension set up explained

via Setup morning, notes for the absent! | Caterham Academy Racer

SETUP MORNING, NOTES FOR THE ABSENT!

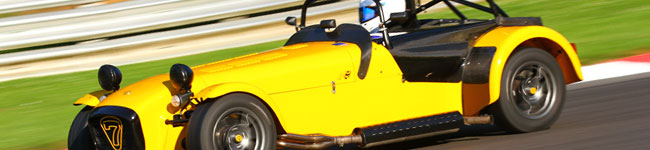
Yesterday, we were all invited to a morning at the Caterham Factory in Dartford. The primary focus of the day was on giving an insight to everyone as to how you go about setting up a Caterham for racing, rather than the road.

With Dartford only being 1.5 hours away, I decided it would be just about bearable to take the Caterham. Unfortunately, it was cold and a it brought all those memories flooding back of driving over to Keevil airfield in sub-zero temperatures. It didn’t help that my driver side mirror was pointing in exactly the wrong direction. This was bad enough while on the motorway, but getting to roundabouts in Dartford was not fun! I stopped in a lay-by to see whether I could adjust it and found fellow Academy racer Charlie, having just finished tucking into a bacon sandwich. He kindly offered the other two hands that you need to do anything on a Caterham, and the relief at being able to see behind was extreme!

Almost as much as the relief at holding onto a hot cup of tea after arriving at the factory! There are times when tea is the only medicine. After driving a Caterham on the M25 is one of those times.

After the usual natter with everyone, it was straight onto the setup talk by Simon Lambert. Ably assisted by glamorous assistant Mark Rider. There are others in Group 1 that couldn’t make the setup mornings, so I had agreed to take notes. Those notes are gathered here! It’s up to those competitors to work out whether I’m mean enough to throw in a curve ball or two into the mix :).

Ride Height

Description
Measured from the chassis rail to the floor just in front of the wishbone attachment point. This needs to be a minimum of 140mm for the Academy, although it is generally set at 145mm minimum as there is little benefit to running on the limit and this doesn’t allow for any suspension sag or tyre wear. It should be checked regularly. Track miles will wear out tyres and cause suspension to settle and sag a little.

Adjustment
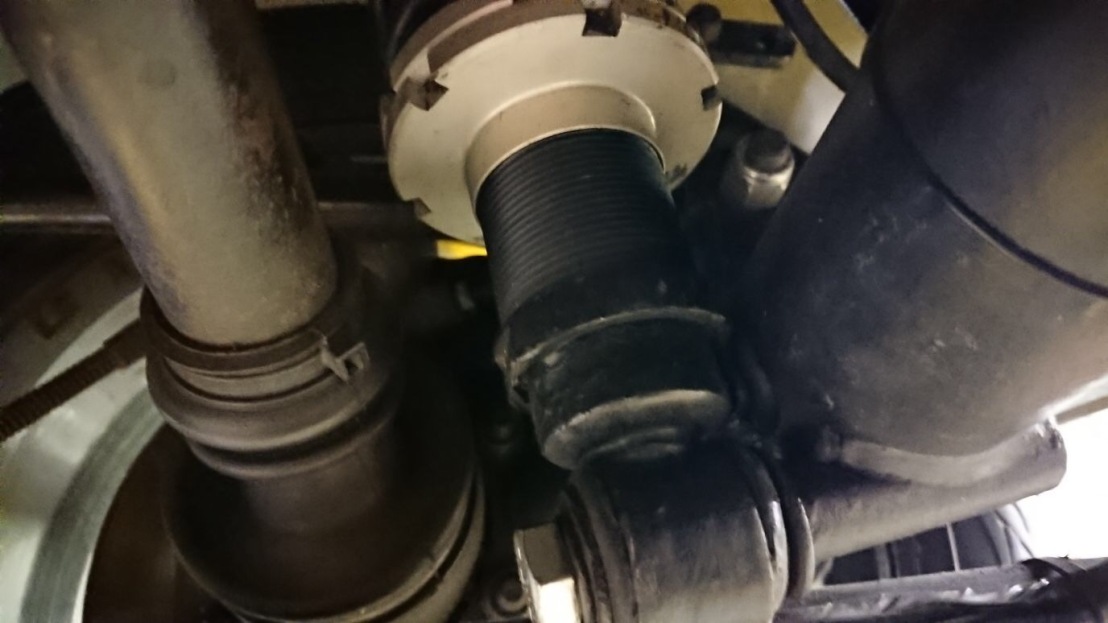
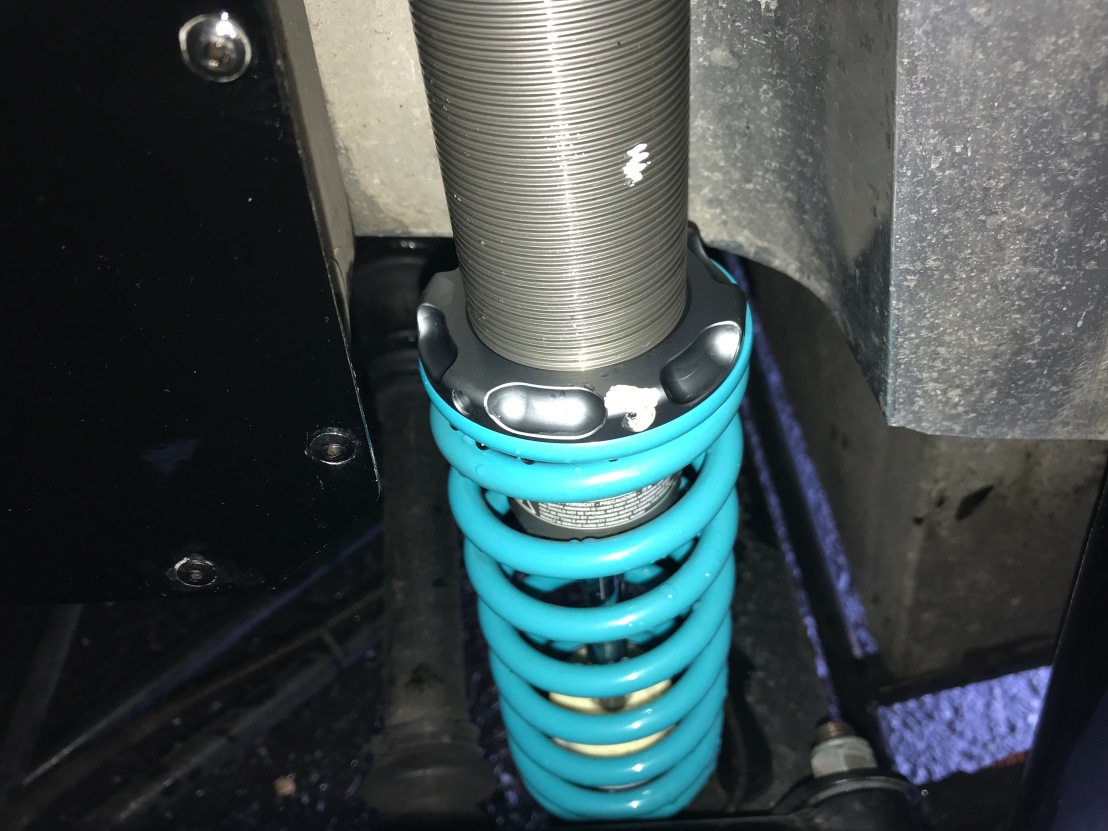
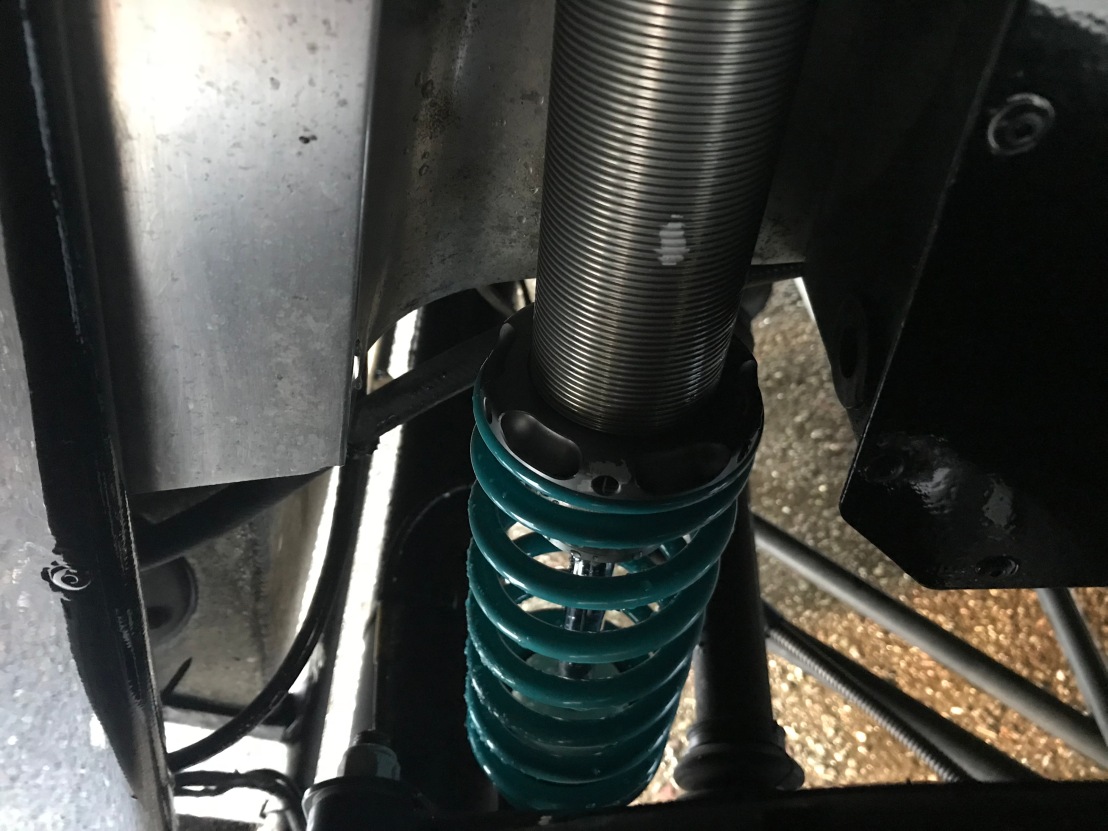
To raise the ride height, the upper platform at the bottom of the spring/damper unit should be screwed further up (compressing the spring more). To lower the ride height, the top platform should be loosened (decompressing the spring). Once set, the lower platform should be tightened up to lock them in place.

Benefit
Lowered centre of gravity of the car. This aids in all cornering, braking and accelerating.

Drawback
Little drawback other than grounding out or sailing too close to the wind with the regulations.

Camber

Description
Camber is the angle off vertical that the tyre leans sideways. It can be positive, where the tyre leans outwards, or negative, where the tyre leans inwards. You will only ever want negative camber. The regulations allow for 3 degrees negative camber at the front.

Adjustment
Normally, this is set at 2-2.5 degrees for Academy cars. Front camber is adjusted by releasing the top wishbone from the upright. The ball joint assembly is on a thread and ‘tightening’ the ball joint onto the wishbone will increase negative camber and ‘loosening’ the ball joint will decrease the negative camber. Rear camber is possible to achieve with metal shim inserts. The De-Dion has in built camber and for the Academy, it is rare to add any different setting as this reduces traction under acceleration.

Benefit
Adding negative camber allows tyre to sit flat on the road when leaning over under cornering load, therefore increasing tyre contact patch and so, grip under cornering.

Drawback
In a straight line there is a reduced contact patch on the tarmac and therefore less grip available to accelerating and braking.

Caster

Description
Caster is the angle around which the front tyres pivot when being turned. (The front wheel of a bike has lots of caster).

Adjustment
Front caster is adjusted using the lower wishbone, by using washers to push the attachment points forward or backward. Factory set is even with two washers either side of the attachment points. It can be moved forward or backward where all 4 washers are one side of the attachment points.
Rear caster is not relevant as the tyres do not turn.

Benefit
When the wheel turns, the caster adds additional camber. It is a way of getting more camber at the front of the car without breaking regulations. Most race engineers will want to set large amounts of caster.

Drawback
The trade off is heavy steering, making it harder to finesse the car and the car is less sensitive at turn-in. Driving style will determine whether these drawbacks are costing more time the the additional camber offers in grip.

Toe

Description
Toe is the angle that the wheels point away from parallel to each other. Where the front of the tyre is closer to the car than the back of the car, that is toe in. Where the front of the tyre is further away from the car than the back, that is toe out. Toe out is set for Caterham’s as this makes the car eager to turn.

Adjustment
Caterham’s are generally set with a toe out maximum in the region of 1.5 degrees per side at the front. You adjust the toe of the front tyres by turning the steering pushrods at either side of the car. This adjustment can also be used to centre a steering wheel that is slightly off centre.

In order to measure the toe, you need to set up axle stands around the car with pieces of wood or similar across the front. Tie string around the wood so that it goes from front to back parallel to the side of the car. (The exact dimensions of the ‘box’ you create around the car doesn’t matter.) You then position the string box so that the centre of each wheel is exactly the same distance from the string. You can then measure the distance from the front and rear of each tyre out to the string and the difference between the measurements is your toe.

Benefit
The car is eager to turn into corners. It wants to be going around bends and so makes turn in more responsive and positive.

Drawback
The car is more unstable in a straight line and will tend to move about. The tyres pointing away from straight ahead also causes drag in a straight line on the tyre as it slips sideways slightly.

Rake

Description
This is the amount that the rear of the car is set higher than the front of the car. Rake pushes more (raised rake) or less (lowered rake) weight onto the front of the car and therefore adds/reduces front grip. Lower rake lessens oversteer and increases understeer. Increased rake increase oversteer and reduces understeer.

Adjustment
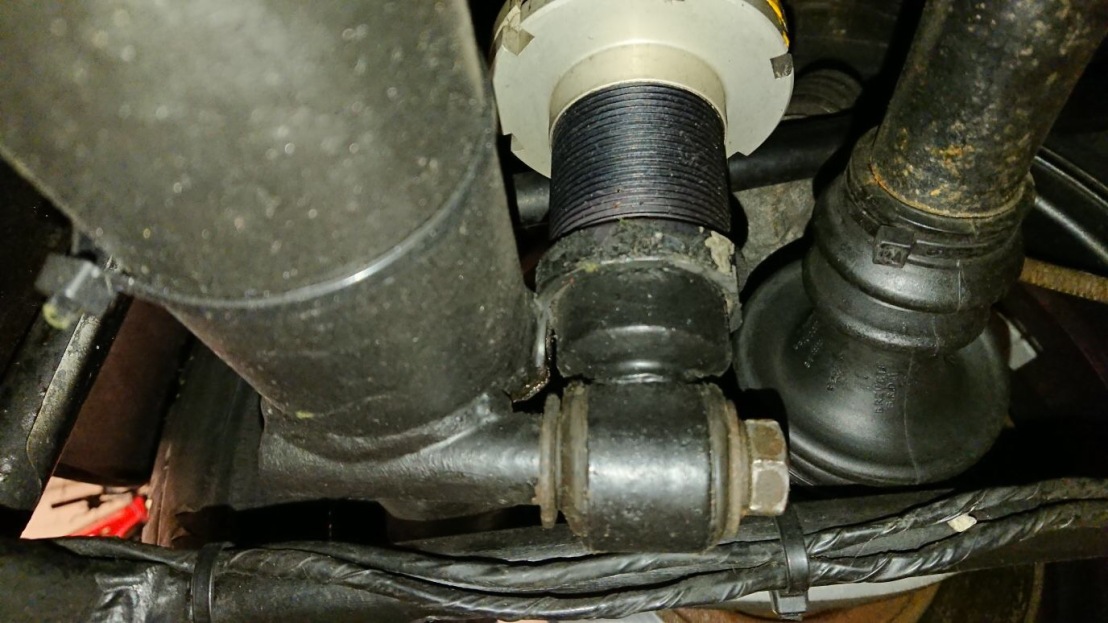
Normally, this is set between 10-15mm higher than the front ride height. It is adjusted by raising / lowering the top platform of the rear dampers. Loosen off the lower platform, turn the top platform to adjust and then tighten the lower platform again once complete.

Benefit / Drawback
It’s more a case of driver preference and track requirements rather than benefits/drawbacks. It is a good way of adjusting the amount of oversteer in the car.

Flat Floor Setup

This doesn’t refer to the car sitting flat relative to the floor, it relates to the setup being carried out on a perfectly flat floor. For this reason, carrying out the adjustments for a flat floor is generally beyond the scope of an amateur builder.

As the car sits on scales on the flat floor, the weight that the car is putting down at each corner can be measured. The weights can be adjusted by raising or lowering the damper platforms.

In Caterham’s it is important to have the weight balance even across the front of the car to ensure maximum stability in braking.

Repeat Process
As each suspension component works in conjunction with all others, changing one will affect the others. Generally speaking, the setup and flat floor process is then carried out again until such time a geometry and weights are as good as they can be.
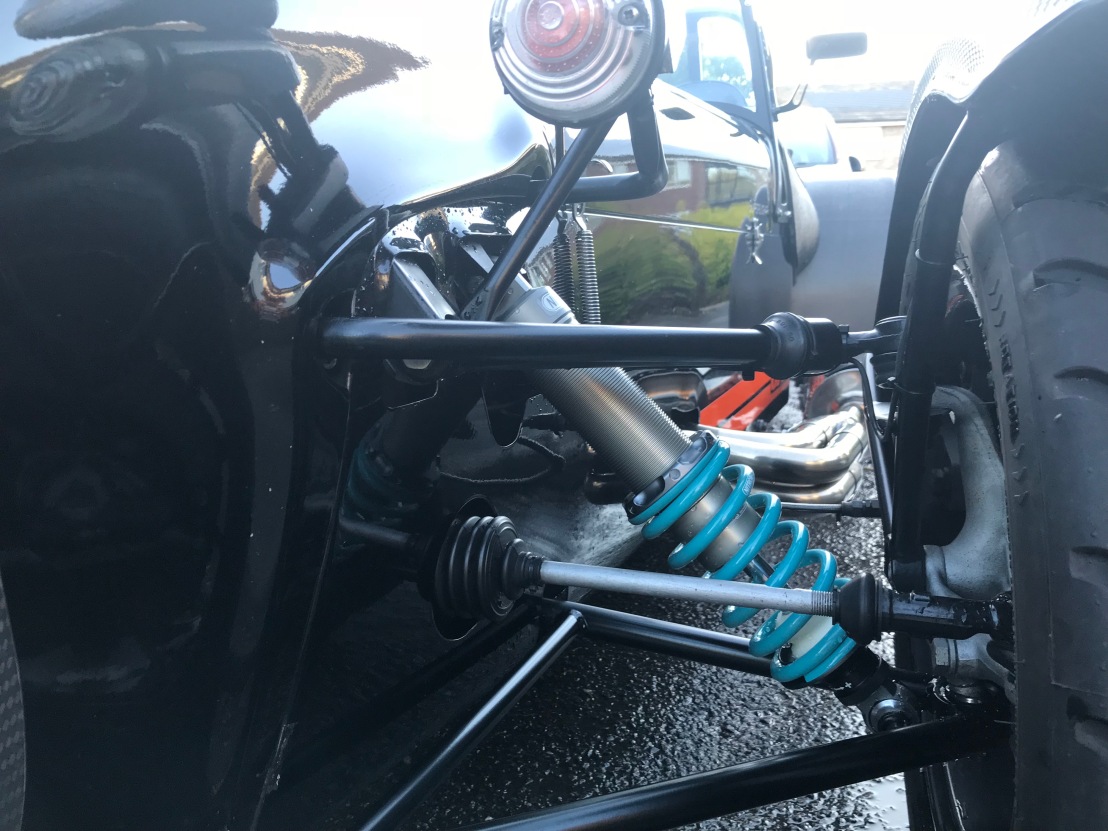
Front Anti-Roll Bar

Another element of the suspension that Academy cars have an option over is the front anti-roll bar. This bar dictates how much the car is able to lean over in corners. Academy cars are only fitted with a front bar and there are only 2 options. An orange bar, that the car is supplied with, and a red bar, that you can buy.

Theoretically, a softer anti-roll bar should be quicker however, a harder anti-roll bar gives a far better feel to the car and therefore many opt to use the stiffer bar. However, in the wet, the orange bar would be preferable as you generally want to increase grip as much as possible in the wet.

Suspension

I took the car into the excellent  Sevens & Classics having found the sump to be a lttle low (o/s 65cm n/s 60cm w/o driver – difference in height due to car being flat floored with my weight).

The sump clearance ideally wants to be 65cm to 70cm – the test is apparently whether a can of coke can roll under the sump.

Discovered that due to original springs sagging over the last 16 years there is insufficient adjustment left to raise the car.

Time to consider my options…. May be time to look at Nitron’s and or Quantum’s offerings.

Purchased Full set of Powerful bushes 31/05/2016

Purchased Full set of Powerful bushes 31/05/2016

Full set of Powerflex bushes for road & motorsport use – Caterham 7 (DeDion w/o Watts linkage) from Awesome GTI (Order No.: 200002952)

Large lower wishbone bush 1/2″ Bore (4 Bushes) – PF8-901 (Ref 1)

Small upper wishbone bush front bush (2 Bushes) – PF8-902 (Ref 2)

Front anti-roll bar bush 19mm (2 bushes) – PF8-905-19 (Ref 3)

Large upper wishbone rear bush (2 bushes) – PF8-904 (Ref 4)

DeDion “A” frame centre bush (1 bush) – PF8-907 (Ref 5)

DeDion “A” frame mounting bush (2 bushes) – PF8-909 (Ref 6)

Rear axle link bush (2 Bushes) – PF8-909 (Ref 7)

Rear axle link rear bush 1/2″ bore (2 bushes) – PF8-901 (Ref 8)

The stainless steel components are machined on the latest computer controlled equipment to ensure perfect repeatability and quality.
The moulding and tooling, design and manufacturing is carried out within the factory ensuring very rapid response time to special projects and complete communication between development, prototyping, testing and manufacturing departments. Component manufacturing is carried out with the latest automatic processing equipment ensuring 100% right first time quality. Testing of new components is carried out both on the vehicle and on test rigs. <
POWERFLEX were selected to receive a Queen’s Award for Enterprise International Trade 2013 and in December 2014 accredited to ISO 9001 as a manufacturer underlining their quality and stature as a global exporter.
Polyurethane has been with us as a specialised plastic for some thirty years. However recent advances have now made it possible to engineer very special properties into this exciting material. Suspension bushes are some of the most highly stressed components fitted to a motor car. They undergo enormous strains and in the most arduous of conditions with no maintenance or lubrication.
The material they are manufactured from is a rubber compound containing natural products which deteriorate with age. It becomes softer and more pliable, resisting the forces placed on it less and less. Therefore allowing more and more movement of suspension components and offering less and less control over the suspension geometry.
This in turn causes accelerated tyre wear, braking instability and poor handling. This is the single biggest reason you can instantly tell the difference driving a three year old car compared to a showroom new one. However even new cars will benefit from POWERFLEX bushes because of their superior design they offer much more effective control of the suspension components to a much greater extent than normal rubber items.

Power flex are so confident that they offer a lifetime warranty.

£391

Daniel French’s excellent Shock absorber / spring unit Fr + Rr fitting guide

Fitting Guide

Firstly – the disclaimer… This is my shock replacement guide for my De-dion Caterham .  I’m not suggesting this is the only way to change your shocks, and this is by no means the best way, but the method that worked for me.  I’d recommend reading the full guide before you begin as there may be variances between my car and yours (if only slight).

I started at the front of the car, as the shocks are more accessible and it just felt like the right end to start at.

Firstly with the handbrake engaged loosen all the wheel nuts, both front and rear.  Next jack the front of the car up (I use the central point behind the horns where the chassis tubes form a cross).  I have a pretty decent jack, so didn’t feel the need to use axle stands, but it would be worth lowering the car onto axle stands if you don’t trust your jack.

Remove the wheels (and the nosecone if you feel this gives better access) and you should be looking at something like the picture below

Bilstein shocks on my Caterham R500 Duratec ready for removal
Bilstein shocks on my Caterham ready for removal

Using a 6mm hex adapter in a ratchet or a 6mm hex/allen key remove the lower suspension bolt pictured below.


Use a 6mm Hex / Allen Key to remove the lower suspension bolt
Use a 6mm Hex / Allen Key to remove the lower suspension bolt
The upper suspension bolt is a more fiddly to do, or should I say ‘brave’… You need to push in the body skin somewhat with a fair bit of force to get reasonable access to the upper bolt.  Once you’ve pushed the body skin inwards, use a long arm hex / allen key, ideally with a rounded end and remove the bolt as per the picture below.
Removing top front suspension mount bolt using 6mm long arm hex key

Now both suspension bolts are removed, the shock will either slide out, or may need a little wiggle.  If you pull the shock down through the wishbone this seems to work best.

Repeat the above steps on the other side of the vehicle and both from shocks will be removed.
Nitron also supply a metal bush fixing kit, which makes the shock swap even more hassle free.  The metal bushes come with an o-ring and require a little grease then are slotted onto the top and bottom eyes of the suspension tube ends

Metal bush shock fixing kit with o-rings
I just put a little bit of grease on the metal bush and on the o-ring, then you push two of these metal bushes together around the suspension tube end (see picture third below)
Metal bush, greased with o-ring fitted

You will need to remove the metal sleeves from both rubber bushed ends of the front Bilsten shocks – this should be easy, so long as they were copper slipped before they were fitted.

Remove both metal sleeves from rubber bushed ends

Then with two of the metal bushes greased (with O-rings in place) place them together over the suspension tube mounting eye.  I thought it was worth re-applying some copper slip to the metal sleeve prior to inserting – see picture below.

Metal bushes and metal sleeve being fitted to top mount of Nitron Race R1 shock

Repeat the metal bush fitting process to all four front suspension mounting points, and ensure the metal sleeve is fitted into each mount too.

With the shock complete and ready for fitting it’s time to fit the shock.  It’s just the reserve of removal and pretty straight forward.  Carefully push the shock into place (note these are spring at the bottom, not at the top like the Bilsteins).  Secure the top of the shock first, by lining up the mounting eyes and then pushing in the bolt.  Use the long arm hex key to gently tighten.  Due to the shorter shock body I found the lower suspension mount requires you to gently lift the wishbone to line up the mount with the bolt hole, but when lined up simply insert the bolt and tighten gently – torqueing the bolts will come a bit later.

Nitron Race R1 shock with RAL 2004 springs fitted to the front of my Caterham R500
Nitron Race R1 shock fitted to the front of my Caterham

With the first shock fitted, complete the process on the other side, refit the wheels (and nosecone if removed) then lower the car.  With the car lowered torque both suspension bolts to 20nm and then that’s the front shocks replaced – oh yeah and don’t forget to torque your wheel nuts too!

Now onto the rear shocks… This is similarly straight forward as per the front shocks, but I’ve detailed the process below, skipping some points as I’ve detailed those stages above.

First loosen the rear wheel nuts, then jack the car up.  Again use axle stands if necessary, but this is the lighter end of the car, so most jacks shouldn’t be under too much load.

You’ll need to start by using a 19mm socket to loosen and remove the lower suspension mounting bolt as pictured below.

Use a 19mm socket to remove the lower suspension mounting bolt

Then using an 8mm hex adapter in a ratchet or a long arm hex / allen key loosen and remove the top suspension bolt through the hole which is located behind the seats (pictured below).

Loosen top suspension mount using an 8mm hex / allen key
With the rear shocks removed, remove both metal sleeves from the upper rubber bush (there is only one on each rear shock).
Remove the metal sleeve from the upper rubber bush

Repeat the process of greasing the Nitron supplied metal bushes, fitting the o-ring and pushing them together on each end of the suspension tube eyes (which I detailed above).  Also re-apply some copper slip to the outside of the metal sleeve, and insert the metal sleeve into the top metal bushes, then align the upper suspension mount first.  It’s a little tricky to line up properly, but once it’s lined up push the bolt through and gently tighten this should hold the shock in place whilst you fit the lower shock mount.

Lining up the upper suspension mount can be a little tricky

With the upper suspension mount holding the shock in place, you need to align the lower bolt to the De-dion mounting boss.  You have to be very careful here as you don’t want to (cross?) thread the boss in the De-dion tube for obvious reasons!

Carefully line up the lower mounting bolt with the boss on the De-dion tube

With the lower mount lined up, securely tighten the bolt and then the shock is fitted.

Lower shock bolt secured in place

Repeat the process on the other side, and then both shocks are fitted.  It’s a little difficult to get access to the lower suspension mount for torqueing purposes with the wheels fitted, so I torqued both upper and lower rear suspension mounts whilst the car was still on the jack with the wheels off.  The torque setting for both upper and lower mounts is 54nm.  Your shocks will now be fitted and ready for use, simply refit your wheels, torque the wheel nuts, lower the car off the jack and you’re ready to go!

Rear Nitron Race R1 shock with RAL2004 coloured spring fitted to my Caterham R500 Duratec
Rear Nitron Race R1 shock fitted to my Caterham
 Just to give a good visual overview of the shocks I created a quick video which is embedded below…

So after my short blat, the initial first impressions are that the shocks are much more responsive, and the car turns in a fair bit quicker with less understeer.  I’ve not fiddled around with the one way adjustment yet, but they come factory preset at -10 out of 24 available settings, so I should be able to crank them up to -5 for the upcoming track day this weekend and report my full findings.

In terms of the quality of product, service and the general ‘look and feel’ of the shocks, I’m very happy indeed.  You can visit the Nitron website for further details and pricing information by clicking the following link:- http://www.nitron.co.uk

All credit must go to Daniel French and his excellent website.  The full guide can be found at:   http://www.caterhamr500.co.uk/2015/04/nitron-race-r1-shocks-and-fitting-guide.html.